Setting up a Virtual Environment by venv
--break-system-packages
flag, and we are going to respect that. Either we install the missing package as
Ubuntu-package (sudo apt install python3-PACKAGE) or we create a virtual Python
environment. Generally the version behind Ubuntu-Packages will never exceed those
from the original Python-Packages; thats why we are focusing on the latter, the
virtual solution.
The instructions have been evaluated for Python 3.14.6
Basic Set-up & Usage
To create an virtual Python environment by venv (natively included in the system's Python) execute following command inside the Terminal:
python3 -m venv PATH_OF_ENVIRONMENT
The NAME_OF_ENVIRONMENT ist also the name of the directory. Now jump to PATH_OF_ENVIRONMENT/bin/,
open the Terminal from there (F4) and activate the environment by
source ./activate
From there on you can run the commands for python3, pip3 and so on by directly tipping it into the Terminal independently of the working directory, in which your Terminal points.
With deactivate your Terminal will leave the environment turning back to
the system's Python.
Advancing the Set-up: Python-venv to global PATH variable (by helper-script)
To comfortably access multiple virtual environments by a custom Terminal-Command from anywhere, one recommended way for this is at least to create one "helper-file" (e.g. vhelper), capable of managing all environments at once, and additionally modify an already existing system-file (.profile).
Goal is to implement a new Terminal-Command (by a helper-file called "vhelper") which automatically recognizes all Virtual Python-Environment present inside a directory and can be each activated by its foldernames. When the name of VEnv is chosen to be called "NAME_OF_ENVIRONMENT", then this VEnv shall be activated simply by following Terminal-Command:
vhelper NAME_OF_ENVIRONMENT
These are the expected directory-structure & command-usage for the following scenario:
Scenario-example
Collection of virtual environments (folder):    $HOME/.venv

New virtual environment (folder):               $HOME/.venv/NAME_OF_ENVIRONMENT

Terminal-Command to activate the environment:   vhelper NAME_OF_ENVIRONMENT
-
To create an virtual Python environment jump to
$HOME/.venv, open the Terminal from there (F4) and execute following command:Terminalpython3 -m venv NAME_OF_ENVIRONMENT -
Create File (vhelper) at $HOME/.venv and add these lines...
$HOME/.venv/vhelper#!/usr/bin/env bash if [ -f "$HOME/.venv/$1/bin/activate" ]; then ENV_PATH="$HOME/.venv/$1/bin/activate" bash --rcfile $ENV_PATH -i else echo 'Error: No Python-Environment found with the name "'$1'" ' fi -
Grant execute permission to your file
Terminalsudo chmod +x $HOME/.venv/vhelper -
Either export that base folder path so that you can find it on command-line by clicking tab...
TerminalPATH=$PATH:"$HOME/.venv" (only valid for Terminal-session)or
for global recognizion on each system-start (permanent solution) open $HOME/.profile and insert following lines:
$HOME/.profileif [ -d "$HOME/.venv" ] ; then PATH="$HOME/.venv:$PATH" fiafter OS-restart vhelper-script will be recognized by the OS-Terminal
-
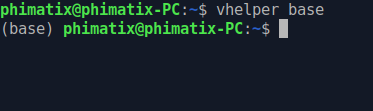
Now you can use it from anywhere by just typing the command...
Terminalvhelper NAME_OF_ENVIRONMENT -
Deactivate the VEnv-session by
exitordeactivate(exit preferred. Terminates process) -
Optional: If you would love to keep the Terminal-format and -color of the prompt after switching to the VEnv, then customize the file "activate" inside the bin-folder and insert following new line
export PS1= ...after line 50:$HOME/.venv/NAME_OF_ENVIRONMENT/bin/activate 48 49 50 51
_OLD_VIRTUAL_PATH="$PATH"
PATH="$VIRTUAL_ENV/bin:$PATH"
export PATH
export PS1='\e[1;32m\u@\h\e[0m:\e[1;94m\W\e[0m$ '
General Note: Don't change the foldername of the VEnvs, so make sure to check their spelling before executing their creation.
Usage & Results
Open the Linux-Terminal (Win + T) and activate your Python3-Venv (NAME_OF_ENVIRONMENT = base) by your custom set command:
Advancing the Set-up: Python-venv to global PATH variable (by source)
Instead of creating a helper-file comfortably accessing multiple virtual environments it is even more comfortable to access python-environments by the source-command. The two big advantages are, that it makes the vhelper-file obsolete and provides a working 'deactivate' command.
-
To create an virtual Python environment jump to
$HOME/.venv, open the Terminal from there (F4) and execute following command:Terminalpython3 -m venv NAME_OF_ENVIRONMENT -
Create File (python) at $HOME and add these lines...
$HOME/python#!/bin/bash if [ -z "$1" ]; then echo "Fehler: Bitte geben Sie eine Umgebung an (z. B. 'source python base')" return 1 fi UMGEBUNG="$1" PFAD="$HOME/.venv/$UMGEBUNG/bin/activate" if [ -f "$PFAD" ]; then source "$PFAD" else echo "Fehler: Die Umgebung '$UMGEBUNG' wurde unter $PFAD nicht gefunden." return 1 fi -
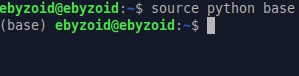
Now you can use it from anywhere by just typing the command...
Terminalsource python NAME_OF_ENVIRONMENT -
Deactivate the VEnv-session by
deactivate.
General Note: Don't change the foldername of the VEnvs, so make sure to check their spelling before executing their creation.
Usage & Results
Open the Linux-Terminal (Win + T) and activate your Python3-Venv (NAME_OF_ENVIRONMENT = base) by your custom set command: